Saturday, July 31, 2010

FREE STUFF!

I walked away from the "yard" sale with three bags of stuff. A couple of books, a couple of toys, a pair of shoes and LOTS of clothes. I am washing everything as we speak so I don't have much to show yet EXCEPT this sweater because it is dry clean only


I know it is hard to tell in the picture but it is WAY cute. It is slightly itchy and I don't usually do dry clean only, but my husband takes his pants in when he is teaching at work so I guess I have an excuse now. Also I have a picture of this outfit I plan on using to play a joke on my husband later


What do you think? I think the joke is gonna be on me because I bet he thinks it is HOT! haha My SIL told me, "Well, if you are late for church tomorrow, I will know why!" heehee

LOVE free stuff because I got a pair of the cutest cropped pants that I would NEVER have spent money on because let's face it...when would I EVER get to wear them? To story time or grocery shopping?!?! NOPE! But I tell you I slipped them on, zipped them up and was in LOVE. It was like they were made for me and they "make my A$$ look fabulous!" ( If you know what line that is from I love you already! )

So more pictures of free stuff to come. A lot of the shirts I grabbed don't quite fit and need to be altered so that gives me things to blog about. Hopefully they all work out and I will have some cute new outfits. WOO HOO

Happy Saturday Y'all! I need to do my lesson for church tomorrow and do a bunch of sewing. I decided to FINALLY do the buttercup bag pattern and because of the material I used it is turning out SOOOOOOOOOO FREAKING CUTE! I want to keep it but it is for my niece. I am sure she will love it to though. Can't wait to post pictures.

Friday, July 30, 2010

Tomorrow

Thrift stores and yard sales are my happy place. Well, if I am childless they are wonderful! I have always enjoyed them ever since I was younger. My sisters and I enjoyed thrift store shopping every chance we got and LOVED showing off our cool finds. I STILL have some thrift store items from when I was in Jr. High. I am SO excited because tomorrow morning my church is having a "yard" sale. I used the quotes because there is NO MONEY involved. It is ALL free. Seriously....a FREE THRIFT STORE/YARD SALE! It's like I have died and gone to heaven, PLUS I got to take stuff I didn't want any more and drop it off earlier this week for others to enjoy. Can I just tell you how freaking cool this is?! We did it a couple of months ago and I got TONS of clothes that I have been re-purposing. I am so excited to see what I will find.

Happy Friday! I can't wait to show y'all what I get. EEEEEEEEEEEEEEEEEEEEEEE

Ipod Case

I made an ipod case for my nephew. He is 13 or 14 and I wasn't sure about what he was into. I decided on skulls. I figured every guy would appreciate that. I knew he had a ipod Nano so I looked up the dimensions on line. Then I looked some cases up on etsy.com for some ideas. I think mine turned out good.


Considering I didn't have a pattern and was just winging it, this was pretty darn simple. I mean like, half an hour TOPS simple. That includes cutting it out. I was super surprised these things sell for as much as they do on etsy.com. Some people were selling them for 25 bucks! I used a fat quarter I got from walmart for 1 dollar and barely used any of it. I used terry cloth for the inside so it would be soft against the ipod. I put a loop on it so I can add a key chain for him.


It has the pocket in the front for his ear phones. Now I just need to make me one for the ipod I got for Christmas that sits in my car. I just have to decide on what fabric to use.

Mini Tutorial

Do you remember how I said I had something in mind for the crayon purse tutorial scraps? Remember how you had to cut off the corners of the purse? Well I HATE throwing those away. So depending on the purse I figured out a way to keep them and make the purse cuter. I take the scraps


I find the one I want to start with and place it in your hand


I take the next one and put it around the outside of the first one. I keep doing this until all four are stacked. It makes a cute flower! Make sure you switch the way the points go. If the first one has the points side to side, make sure the next one has the points going up and down. This is what makes it look like a flower


Then I sew it on to the purse. Now you don't have the wasted fabric AND the purse is even cuter. Mission accomplished.


New Friend Fridays


I welcome any and all new readers! Happy Friday everyone

Thursday, July 29, 2010

Thoughts

My mother sent me an email recently that I am just getting around to reading and I wnated to share some of the quotes from it. Rather then share them all at once, I thought that over the next couple of days I would share one or two. Today I choose this one because as I am sitting here in my living room with it half cleaned up, with my apron on trying to prepare my lesson for church on Sunday while the kids are napping, before I get to the dinner I need to cook because we are feeding the missionaries from our church tonight, i found THIS one perfect for ME today! Hopefully it will be PERFECT for someone else who reads this too! Have a wonderful day!

"I don't want to drive up to the pearly gates in a shiny sports car, wearing beautifully, tailored clothes, my hair expertly coiffed, and with long, perfectly manicured fingernails.
I want to drive up in a station wagon that has mud on the wheels from taking kids to scout camp.
I want to be there with a smudge of peanut butter on my shirt from making sandwiches for a sick neighbors children.
I want to be there with a little dirt under my fingernails from helping to weed someone's garden.
I want to be there with children's sticky kisses on my cheeks and the tears of a friend on my shoulder.
I want the Lord to know I was really here and that I really lived."

— Marjorie Pay Hinckley

A Giveaway?

Does anyone else get sick of giveaways on other blogs? Like, I don't MIND giveaways, I think they are cool. I mean free stuff is ALWAYS AWESOME. What I am talking about are the blogs that have like 1000 followers who are waiting to see cool stuff or ideas and lately most of them seem to all be post about a giveaway from their new sponsors. It is a little frustrating for me as a follower. Like I said, I am okay with the occasional or even like, once every other week but these every other day ones I just ridiculous. Especially if you are not posting anything in between. Okay. Enough said, just wanted to get that off of my chest.

That being said, HOW ABOUT A GIVEAWAY! HAHAHA No but really. I am coming up on my YEAR anniversary with my sewing machine!!! This is when my life changed! I freaking LOVE my sewing machine and have no idea where or who I would be without it now. Best 100 bucks ever! SOOOOOOOOOO I want to sew something for a giveaway. I have a BUNCH of other projects in the works so I thought I would ask first, WHO IS INTERESTED? And second, WHAT SHOULD I SEW FOR THE GIVEAWAY? I just recently figured out how to sew ipod covers. SO easy and So cute! It could be a flower brooch or hair clips, a purse, a wallet.....WHAT DO Y'ALL WHAT?! Leave me some comments and let me know and sometime next week we will have a giveaway to celebrate me getting my sewing machine. I got my fabric from fabric.com on Monday! It was so exciting. Check out how pretty it is


Look at all of that fabric WAITING to be used as a giveaway prize. haha Let me know if anyone else is interested in the ART EXCHANGE TOO! I still need one more person.

Wednesday, July 28, 2010

Crayon Purse Tutorial

I am in the process of making some gifts for my nieces and nephews in New Jersey. Wendy ( my SIL ) is having her SIXTH baby! I wanted to make some baby onesies but then I felt weird about sending only the baby a present. Of course that means making 5 other things. I lived with Wendy when Cody and I first moved to Texas. I say "I" and not "We" because Cody was in Kuwait pretty much the whole time. I took care of her kids a lot and so I really love her kids. I have only meet number 4 once and I have never meet number 5. We hope someday to reunite so we can meet 5 and 6. ANYWAYS. Number 4 likes Dora so I wanted to make her a Dora purse. Then I decided I wanted to make her a crayon roll so then I put the two ideas together.

Now, I found these on etsy.com for sale, but I didn't see any tutorials any where on blog land giving instructions on how to make one. Unless I just didn't put the right title into Google, which very well could be. Tutorials take time and I do NOT want to sit her and make a tutorial for something 20 people have already done one for. It is a waste of time in my point of view. That is why I do not have a lot of tutorials up because honestly people, someone some where has pretty much done all of them! haha

So I started with the inside of the purse because that is where the crayon holder will be. Here is a picture of what it turned out like.


I like that the purse is tall enough that you can put in both crayons or tall colored pencils.

Started out with 2 11X11in squares for the outside ( I used flannel )
then 1 11 X 5in piece for the pocket.


Let's start out making the crayon pocket. I took the fabric and ironed it in half like so


Then I added a 11X 2 1/2 in piece of interfacing


then I folded it back over to complete the pocket


I then placed the pocket about 3 inches from the bottom of the bag and pinned it in place. Apparently i forgot to take a picture of this step. But basically you sew it from one side, down the bottom and back around the other side. The sides are gonna be sewn again when you sew the bag closed but this will help keep it in place. It should look like this


Notice, I did a zig zag stitch along the bottom. This was to make sure I stitched down all three thickness and made the pocket stronger. Next you want to measure a little more then an inch into this pocket and sew a line right down the pocket. Back stitch at the beginning and end.


Remember you will eventually stitch around the sides and you want to individual crayon space to be big enough for big crayons or markers, so that is why I made it bigger then one inch to account for seem allowance. Make this as big as YOU want just remember to do it. Next I did 1 inches for each pocket ALL the way till you reach other other side. Remember to back stitch because the kids will be taking these crayons out and putting them back in like crazy so you want your stitches to hold!


Now you are ready to start assembling the two pieces for the inside of the bag. With right sides together, pin the bag from one side, down the bottom and around the other side.


DO NOT FORGET TO LEAVE AN OPENING IN THE CENTER FOR TURNING THE BAG! It should look like this once you have done that


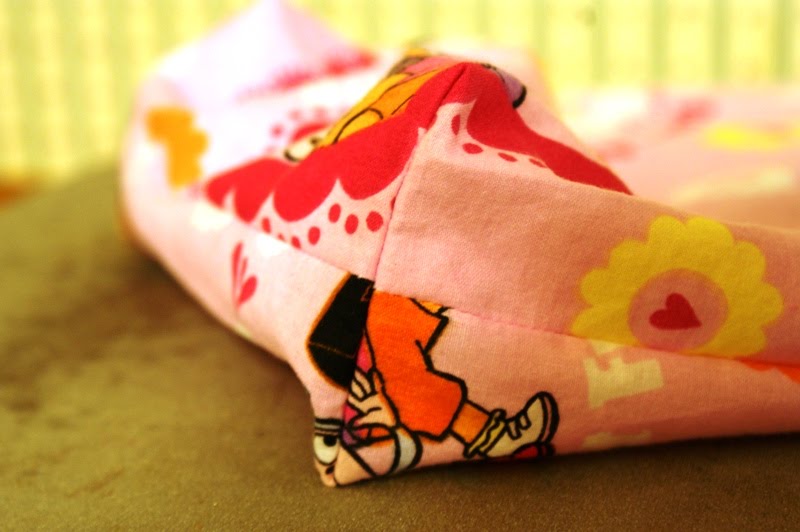
next we want to make corners for the bottom of the bag. I wanted my bag to have a bottom so that she could fit a pad of paper and whatever else she wanted in it. Take the corners of the bag and pinch them together. With the bottom and the sides of the purse coming together at the seams. Make sure you line the seams up or it will look funny after you complete the step. Pin the sides down and measure out 3 inches across the bottom. This is confusing so let's look at a picture for clarification


I usually sew along this line several times to add strength.


Do this to both corners and then clip away the access corner. You will not need it ( but if you HATE to throw it away like I did, keep it and I will show you what I did with mine on a later post )

Now you can put the inside of the bag off to the side and work on the outside of the bag, which should be really easy. We got the "hard" part over with already. Take two 11X11in pieces for the outside of the purse


Pin them right sides together and sew from side, down the bottom and up the other side. This time YOU DO NOT NEED TO LEAVE AN OPENING FOR TURNING THE BAG. Sew ALL the way around the bottom. Next do you corners like before. Then turn the outside of the bag right side out and it should look like this


We are getting close to being done. Now we need to make the straps. I did not use interfacing because I used flannel which is thicker then normal fabric. If you want to use interfacing please add them to your strips here. I used 2 4 X 18 in strips. Take the strip and fold the ends into the middle and iron like so


Next iron it in half


Sew down both sides to complete the straps


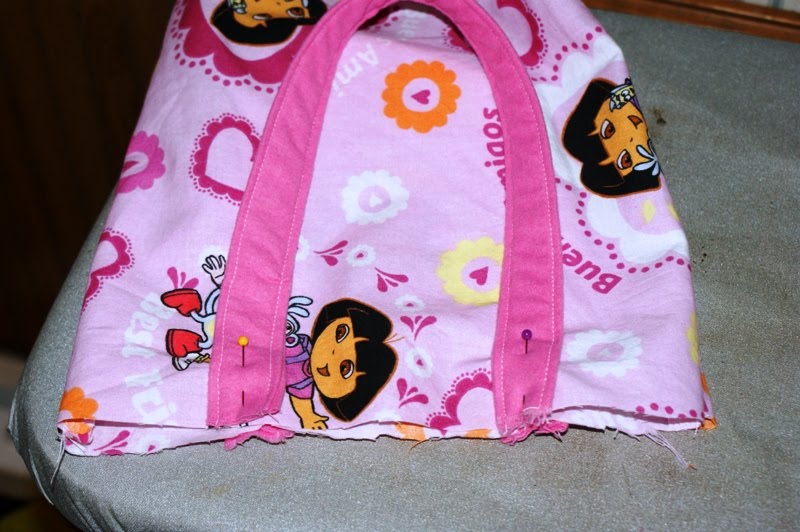
Now we get to start pinning it all together! WOO HOO There are two ways to do this. I line up where I want my handles to be and I pin them on. YOu can leave them pinned or you can do a baste stitch to make sure they stay straight and don't move. I always just hope and pray ( and once I had to un-stitch everything and re-do it because it did NOT stay in place. It is up to you )


Notice the handles are pinned facing down ward towards the bottom of the bag. If you have never made a purse before this probably seems weird but trust me when I say it will end up the way it is supposed to be after the bag is done.

Next you take the inside of the bag and put it around the OUTSIDE of the bag.


Right sides should be facing. Pin them together all along the top. This is where the basting comes in handy. What I do is line up the sides of the bag first, then pin in towards the middle. When I get to a handle, I hold it in place carefully, un pin it and pin all three layers together. If you basted it, you don't have to worry about that.


Notice the right sides of the fabric and facing in towards each other


Now you are ready to sew. Make sure the handles are INSIDE of this sandwich. Sew along the top. Now you are ready to turn it right side out


Stick your hand inside the hole we left in the bottom of the inside of the bag and pull the outside out.


Now you can stitch the bottom of your bag closed either by hand or with your sewing machine. I think it looks better with the sewing machine but I just don't hand stitch well. Then push the inside of your bag inside and iron the top flat. Then I always add another stitch around the top to keep the inside of the bag down and it give it a more finished look. On this purse I used a zig zag just because it was for a little girl and I thought it would be more fun


And we are done people. It really doesn't take more then an hour or two ( if your kids allow you to do it )

Tada


At first I didn't like how tall the bag was and how skinny it was. After I tried putting the colored pencils in, I am LOVING how tall it is now since I know they fit. Hopefully that was easy to follow and no one got lost. Again, if you get lost, feel free to leave me a comment and I will try my best to help. If you have made a bag before, it should be easy peasy! ENJOY!! Also, come back later today or tomorrow when I show you the flower I made out of the corners to add to the purse.

Adding to some link parties


CreativeShareWednesdays

Hump Day link
Life in the Pitts

NightOwlCrafting


Sugar and Spice
Show and Tell @Blue Cricket Design
Someday Crafts

Tuesday, July 27, 2010

Art Exchange

The art exchange sounds fun to me! Basically what happens is you make something artsy. You get an address from me of someone to send it to ( and their blog address so you can get to know them first if you want ) and then you mail it to them. You find 6 people who want to play along and give them MY address. This way we all get fun things in the mail. I did this once before with Flip Flops. I didn't end up getting any in the mail but my sister got a pair or two. It is fun in theory if everyone plays along.

The "art" can be anything really. A photograph. A handmade card. Something you sew. Something you create. Jewelry you make. ANYTHING!

I would LOVE to see what I get in the mail. This is so cool sounding to me but I know it isn't for everyone. You SHOULD get 6 things in the mail because I am only doign this with people who WANT to do it. SO let me know. I think I have 3 people now...right? 3 more people. If anything, you will have a fun new blog to look at. The blog address I got was this one HERE I absolutely LOVE the blog and now subscribe. So all good things will come. 3 more spots people 3 MORE! Let me know.

HATS

I have never been a HUGE hat person. Lately I have been wanting a cute hat for when I am in the sun ( not that it is a lot! ) I found this tutorial a while ago and wanted to use it. I FINALLY got around to it. Go check it out HERE

It came out okay. It was REALLY easy but I made it a little to long on the sides. I am still thinking about fixing that but we'll see. So I took an old navy shirt that had a hole in the boob ( and not in a spot I could cover with a flower! It was RIGHT where my nipple was which was a total bummer. ) Any ways. Here are two pictures. I made two different accessories for it on brooch pins. The first picture is blurry sorry about that.


I might make one for Kayla. We'll see. :)

For tomorrow I have a tutorial! WOO HOO I hope I can get it up on here. I got lots of projects I am trying to work on all at once. Hopefully I can get it all done without going crazy.

Saturday, July 24, 2010

Baby Shower

The baby shower was nice. My SIL and I made the refreshments and we made cupcakes. We thought it would be easier to make simple cup cakes and then stick a little printed out baby shower thing on top to make it cute.


CUTE? YES.

Easier? HECK NO! I had to print them out, cut them out by hand and then tape all of the circles onto tooth picks. Never again...well, maybe. haha Here is where I got the printable ACCENT PARTY This is a WAY cool web site with the coolest ideas and LOTS of free things to print out to make decorating easier. Go check it out!

Here are the onesies I made


One regular tie,, one bow tie. Both are from re purposed clothes. The regular tie is a REALLY old skirt I had from a thrift store from when I was in high school. The bow tie used to be one of Tyler's old shirts. I love how that one turned out. Here is a picture of me and the mommy to be


I can't wait to take pictures of the baby when it gets here. :)

When we were leaving the light out side was really good and the kids love playing out side of our church. After church they are always so tired and if I want to do a photoshoot they usually do not cooperate. I thought, "Maybe now would be a good time". Plus we have gorgeous flowers on the trees out side right now. Check out the gorgeous picture of my girl I got


And check out the not so hot one I got of my boy


And the cute one of my niece


And one more thing before I go to bed. My boy and his cousin were watching Spongebob while my SIL and I were doing cup cakes. I really HATE the show sometimes because of words like, stupid, BUTT, idiot, dummy....things like this. Well today Squidward said, "Oh my aching tentacles." Tyler about two seconds later looked at his cousin ( who is a girl ) and said, "Oh my aching testicles!" HAHAHAHA Nice one. Don't worry though, Madison was quick to let Tyler know he said it wrong.

Everyone have a great Sunday! We are only going for an hour of church and then get to go pick up daddy from the air port! WOO HOO
Related Posts Plugin for WordPress, Blogger...