Showing posts with label flowers. Show all posts

Wednesday, January 25, 2012

Grandma

My mom and dad came to visit along with my sister Kim and her baby Jacob. We had lots of un and ate way to much food.  It was great.  While they were here we went to go visit my Grandma who lives a little over an hour or so away from me in a nursing home.  My grandma wears a wig and she used to always wear a fake flower in it.  SOOOOO  my sister thought it would be fun to make her a bunch of flower clips to bring her.  The night before we went to see her we put the kids to bed and then made some hair clips for her.  We also made some for her roommate because we didn't want her to feel left out!  :)

Check out what Grandma scored.


The white one with the blue in the middle and the pink felt one were for her roommate but the rest were for grandma.  My favorite's were these three 


Kim made the last one.  So we are hoping she is wearing them and that all of the other old ladies are jealous!  haha  Hopefully we can get grandma a man.  Love ya grandma!

Friday, October 14, 2011

Pinterest

Who here is addicted to pinterest?  When the blogging world first started talking about pinterest I had NO clue what it was.  Then I noticed it showing up a couple of times on my STATS for the blog.  I finally decided to figure it out.  I got on it and fell in love immediately.  Then I naturally got both of my sisters hooked and my mom.

Any ways.  I have a board on mine called FLOWERS.  Check it out HERE

I have LOTS of flower tutorials on there.  I also have some under the crafts board that I haven't moved over to the Flower board yet.

If you are wondering what the heck I am talking about and want to join in on the fun of PINTEREST let me know.  I can send you a request to join.  It is so much fun and such a wonderful resource for finding things you need or want.  It is also a great way to share things with people easily.

So take a look under my flower board and find some more great tutorials for flowers.

Don't forget about the GIVEAWAY CLICK HERE  Today is the last day and the contest ends at midnight!  Leave your comments and check back tomorrow to see who wins!

I am off to hit a couple of yard sales with my honey!  We close on our new house any day now and if we don't find some more furniture it's going to look like we spent ALLLLL of the money we had on the house but then couldn't fill it with stuff!  haha  Have a great Friday Y'all!

Wednesday, October 12, 2011

Gathered Flower

Some where on the net I had found a flower tutorial and read it but never book marked it or pinned it.  I remmebered it the other day and decided to give it a try while watching America's Next Top Model!  ( Are my sister's, mom and I the only ones who LOVE that show?! )  Any ways.  I got it done but wasn't sure how to put it together completely so the next day I got on line to find it.  CAN'T FIND IT ANY WHERE! Boooooo  I spent like 3 hours off and on looking for it on the internet and pinterest.  It was driving me CRAZY.  Yesterday I was attempting to clean some of my craft stuff and I found a piece of paper my mom had given me with instructions on how to make several fabric flowers and it was on there!  AHHHHH  I wanted those other 3 hours or so of my life back.  So frustrating.  But before I had realized I had the instructions all along I went ahead and put the flower together how I wanted it to be and put it on another garter.  I LOVE how it came out.


So my question to YOU guys is DOES SOMEONE HAVE THIS BOOK MARKED OR PINNED SOMEWHERE?  You make this flower by take a piece of ribbon or fabric and you basically stitch up and down the length of the ribbon in a zig zag pattern and then you pull the stitch to gather it.  You get this gorgeously gathered petal flower.  Any ways if you have a tutorial for it PLEASE let me know.  I want to see how they say to assemble it AFTER you gather it.  I just kinda did it best I could but am curious what the actual instructions say.

So THREE people have signed up for the giveaway.  And I am giving away THREE things.  haha  SO far I have automatic winners!  If you are reading this now thinking, "What giveaway?"  click here  to check it out and participate!

Tonight we are doing a craft night for the ladies at church and I am teaching them how to make flowers. We'll see how it goes.  I am really excited and hope it will be a success.  "See" Y'all tomorrow.

Tuesday, October 11, 2011

What I Love

What I LOVE most about flowers is that you can use them for just about ANYTHING.  Doesn't have to be a hair thing.  Could be a broach, some shoe clips OR the top to a pen.  My friend Fabi over at Mrs. Sassy Crafter has a great tutorial on her blog for some flower pens.  I was looking at it earlier and she makes the flower in a way I had NEVER seen before.  Don't you just love that?!  I love that a certain flower can be made so many different ways and look the same each time.  Want to see the tutorial?  I thought you'd never ask!  Go check it out here  She has LOTS of really creative things on her blog.  Her latest obsession has making cards and they are so cute.  So go check out here blog and make sure to look at all of her fun tutorials.  She is a super sweet person too so leave her a comment and get to know her.

Wednesday, July 27, 2011

Recycled Flowers

I saw this project in a magazine cut out my sister had in her special folder she made.  She had all sorts of fun and cool ideas, projects and things she wants all cut out of magazines and neatly placed in a three ring binder.

Yeah...I'm not that organized but I am glad SHE is.  While I was in Utah she got it out and I flipped through it.


So here is my version of what I saw.  I took a penny saver ( whatever kind of paper you want.  Book pages, newspaper, ads...whatever )  And I LOVE that I used the penny saver because we just throw it right in the recycling bin pretty much every single week.  Makes me so happy to repurpose these!

Let's get started!

Ripped out some pages from whatever source you are going to use.  Take some water and some water color paints and paint the heck out of your pages.


I tried a couple of different things here.  Here I painted the paper.  I also tried coloring the water and the crinkling up the paper and sticking it in the water.  Both work.  You have to have the water REALLy dark with the color though.  I let that dry.  Do both sides because you will be seeing both sides of the paper when it is all said and done.

Next I took some of this fabulous stuff


And I added it to some water ( I didn't want it to stiffen the paper TOO much! ) and coated the paper AGAIN!  Let it dry and then crinkle the paper.

Next you can do TWO different things.  I tried both and I am not sure which one I like better.

The first thing you can do is CUT petals out of your paper.

OR

You can rip petals out of your paper.  I like the look of both so try out both and see which one floats your boat!

Next you want to take a smaller petal and glue it to the center.  In the picture you see regular glue BUT I ended up using the glue gun and it worked SOOOO much better because it dried instantly.  Just be aware that paper is THIN and you will probably burn yourself at least once.  I kept putting my finger under the paper and then pressing directly onto the glue gun. DUH!  haha  When I use ribbon or fabric it's usually thick enough to not burn.


I found this floral wire at the dollar store and thought it would work perfect!  They had many different colors and any color would have looked great.


Put some glue on the wire and then roll the paper around it.


It should look something like this.  Then just start glueing all of the petals on.  I try and go from one side to the other to fill in all of the spots.


Once you get it looking good, try bending the petals out a bit so it doesn't look flat.


At this point I wanted them to stay like they were and so I wanted to add a top coat.  I have this


I took my flowers out side and sprayed the heck out of them using both.  I found the results looked pretty much the same.  Neither of them looked shinny to me but I love how they brightened up the color and made it a deeper shade.

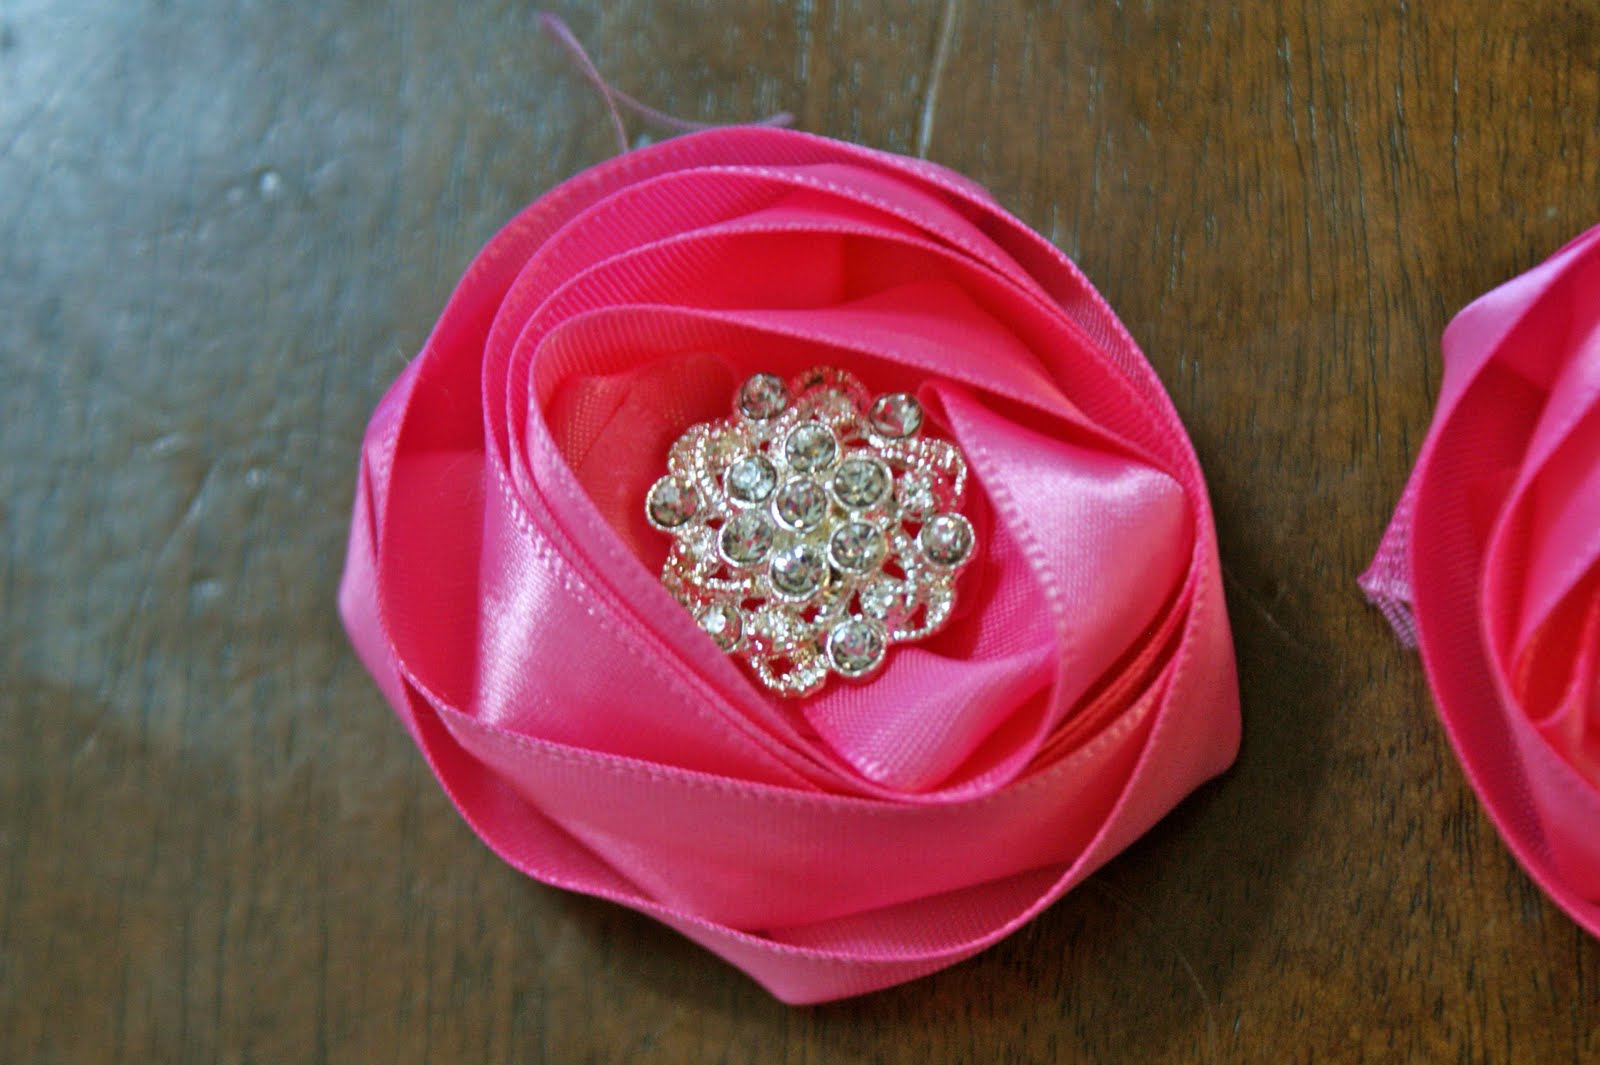
Then I had a little too much fun taking some pictures of them


So go make some flowers.  The nice thing about these is your kids could help you make them.  They take a while only because they need to dry in between coats but other then the glue ( if you use hot glue ) your kids could help.

linking up to some parties


Somewhat Simple

Monday, July 25, 2011

Making

I have been making flowers.  I haven't really taken any pictures of them.  I don't want everyone who actually reads this to get sick of them.  Don't you hate that when someone blogs the same stuff every time.  I feel like that has been me lately so I have been debating on not blogging at all or blogging the same three crafts.  Hmmmmm

This weekend my in laws decided to come surprise us.  It was lots of fun.  My husband smoke us some ribs and brisket and I am telling you it was GOOOOOOD!  And I don't even really like meat.  I made some of the Brazilian Cheese Bread I blogged about.  SO good you guys!  If you have not tried the recipe yet I AM TELLING YOU DO IT!  You will NOT be let down.  My mother in law went home with the recipe and a bag of the tapioca flour so she could make some.  :)

They came to church with us too.  Church was really nice yesterday.  One of the lessons we had was about how our most important calling in this life was that of a spouse and a parent.  It hit home for me.  Who cares what we do in this life we were terrible at raising our kids and were terrible at being a spouse!?!  I mean, really.  With that in mind, I have had a pretty good day with my kids.  Things that normally would drive me crazy have not.  I haven't yelled.  I haven't ignored them so I could craft.  In fact earlier today I had some craft I wanted to try and it just so happened to work out that Kayla could do it too even though it wasn't a kid craft.  You'll see what I mean when I post it in a day or two.  We sat at the table and painted together while my son was playing a computer game with us.  It was nice.  I REALLY don't want to be a failure as a mom.  I want my kids to look back and cherish the times we spend together.  I am working to improve myself all of the time.  Today Tyler told me I was the best mom he ever had!  haha  It makes me laugh because of course I am the best he ever had because I am the only one he has ever had!  But hey...I'll take it!


Here's a quick picture of a clip I just recently made.  I love it

Maybe tomorrow I'll be back with something other then hair clips

Friday, July 15, 2011

Seriously?

I have MORE flowers to post on here tonight.  I know what you are thinking.  SERIOUSLY?  Yes.  Sorry it isn't something more exciting but I have NOT had much time this week to craft.  My husband has been home on vacation so I didn't really have time to myself to do things like that.  I did however, get to go to the town thrift store by myself for like 45 minutes during nap time on Wednesday.  I SCORED!  I got a couple of vintage ( or at least REALLY old ) pillow cases and I have started to turn them into some pillow case dresses for my daughter.  The one I bought to actually turn into the pillow case dress I am having second thoughts on it now.  I am thinking instead of maybe making me a skirt.  We shall see.  I also found a SUPER cute skirt for me in a size 18.  I am not a size 18 however so I must take it in before I can wear it.  Hopefully that doesn't take me TOO long to do.   It's SO cute that I am hoping it helps motivate me enough tot get it done so I can wear it.  I never seem to want to wear any of my dresses or skirts to church.  I also bought a flat sheet and some other pillow cases, some AWESOME stretchy knit I am planning on making a skirt for me with ( it was 1 1/2 yards for only 1.50! )  a wallet, a leather ( well fake leather most likely ), 4 books for my kids and a basket to do new born pictures with and I got it ALL for 11 dollars.  YYYYYYYESSSSSSS! ( said just like Napoleon Dynamite )

Any ways.  Here are the flowers I made the other day using some tutorials I found in blog land.


The first one is kinda plain but I think I will add a leaf or two too it to add just a little something else.  I tutorial I saw put some leaves off of the side and I didn't think it needed them until I tried it without.


I LOVE how this one turned out and it looks so hard but it really wasn't complicated at all.  It didn't take that long either which is a plus for me.  You do have to sew and some people don't like that but it was worth it in my opinion.


This one was EXTREMELY easy and yet looks so elegant if you use the right ribbon.  I think I am going to be adding some tule, russian veiling and/or some feathers to it.  It's super cute now as it is but some other stuff added might make it pretty darn cute too.  And since my girl refuses to use clips or put anything at all in her hair I will most likely be putting these in the etsy shop.  I have been thinking about doing another giveaway too so maybe I'll use some for that!

I hope everyone had a great Friday.  I got to see two friends I haven't seen in forever and have lunch while the kids played.  It was nice.  That's twice in one week I got to hang out with old friends.  Life doesn't get much better than that!!!

PS We also put in an offer on a house.  Keep your fingers crossed for us.  It is a short sale and they were asking more then what we offered.  We are hoping they counter offer and don't just flat out tell us know. We'll see what happens.  I'll keep y'all posted.  EEEEEEE

Wednesday, June 8, 2011

Ribbon Flower Tutorial

I have searched ALLLLLLLL over the internet at fabric flower tutorials.  SERIOUSLY.  I have looked at so many that they pretty much just all run together and when I go to make something, who knows whats going to come out of it. It's fun to see what other people come up with.  Sometimes I hate something, yet they have a thousand comments telling them how wonderful it looks.  Other times I fall in love with something and no one has commented at all.  That is what is so awesome about the craft world.  YOu don't have to like everything!

I search etsy a lot too!  Not for tutorials, but for cute hair things I really like.  Then I will recreate it and try and add a little bit of a spin on it.  Sometimes though, I see something and think, "How did they do that?"  That is when I search for tutorials on line.  There are some I simply just can't find.  Or someone wants you to pay for them. I'm cheap guys.  I don't like paying for instructions.  So there I was staring a a picture of a flower and something clicked.  So I tried it and even though it wasn't exactly what the picture looked like, it was pretty darn close.  So here is my little tutorial on how to make one of these satin ribbon roses with your own two little hands and a needle and thread.


SUPPLIES
Ribbon ( I used 1 1/2 inch hot pink satin )
needle
thread

First things first you want to take your ribbon and hold it near the end and then create a fold.


See how creating the little fold makes the ribbon cup up on the sides?  This is what we want to do.  Here is the underside


Now you want to take that needle and thread and make a stitch or two here to hold it together.


Now you want to make another tuck


And another stitch


See how this is forming the walls of the flower now?  Keep tucking and stitching.  I don't stitch EVERY tuck.  But the first 2 or 3 I do.  Remember that you want to keep in mind how big you want you flower.  I make this outsider circle as big as you want the flower to be or as little as you want the flower to be.


Here a tuck, there a tuck, every where a tuck tuck...and some stitches


Notice now that I have 5 or 6 tucks I have created more walls to my flower.  You want to keep making the walls smaller which means making the tucks bigger AND making sure that before you stitch the tuck is making the shape that gives you the wall and not doing something else.  Sometimes, I had to retuck ad then stitch.

Eventually you will start to run out of space.  This is where you can cut the ribbon and start to make your middle.  I kinda scrunched my ribbon up to my liking and then stitched again.


Isn't it pretty?!  I love how they come out.  My suggestion is the first time you make one don't stitch at all.  Just get a feel for how to do it.  Then un do everything and then try again and then stitch.  I always do this the first time I try something.  This way if I screw up, it's not permeant.


Now you need to do decide what to do with your center.  I wanted the center to be hallow so I could attach a huge vintage inspired button that I got at JoAnn's the other day.


My second one I started the outside out smaller.  I ended up with a bunch of ribbon that I didn't want to cut off so I scrunched it up cute and sewed it down.  Then I added some fake pearls to the center.  I love this one too.


I havent' finished the one with the pearls but for the other one I added some russian veiling, guinea feathers and a green felt leaf.  I then added it to a elastic headband for a tiny baby.  Ain't it cute?


So now go and create!  If you have any questions just let me know but it is seriously simple once you try it once or twice.  Remember just tuck and stitch.  You can't go wrong.

Linking up to some parties


Creations by Kara


Fantabulous Friday!


Trendy Treehouse
Show and Share @ Just a girl
blue cricket design

Related Posts Plugin for WordPress, Blogger...