Showing posts with label recipes. Show all posts

Thursday, November 22, 2012

AWESOME Popcorn

Have you seen the popcorn recipes out there for popcorn?  I LOVE to make popcorn super unhealthily!  haha  You know, lots of salted sweet cream butter.  One of my guilty pleasures is to buy the kettle corn popcorn and after I pop it, I spread melted butter allllllll over it.  MMMMMM

While at my parents house for Thanksgiving I bought a bag of the candy cane chocolate kisses.  I love white chocolate even more then regular chocolate so these things are like heaven to me.  My mom and I popped some pop corn and guess what we did?  Made the best stinking popcorn ever!  Here is what you need


I love that we used healthy choice popcorn!  haha  Pop the popcorn and while you are doing that you need to unwrap about half the bag of candy kisses.  I put the kisses in a glass mixing bowl with two tablespoons of butter ( I used salted sweet cream ) and stick that in the microwave for about 30 to 45 seconds.  Stir until well mixed

Then pour ALLLLLLL over the popcorn and stir until mixed. 


 Then eat and enjoy the couple of extra pounds you just gained ( with a huge smile on your face ).  I am telling you this stuff is awesome.  I would make more tonight only it is Thanksgiving and I am stuffed.  Not full of turkey but we decided to make potato cheese soup for dinner and eat out of bread bowls.  It was delicious.  Let me know if you try the popcorn!  It's seriously divine!!! 

Sorry the pictures are not great.  I took them with my phone because my camera was in the room where the kids are sleeping.  :)

Friday, February 10, 2012

Chicken

We eat a LOT of chicken.  My poor husband.  He loves beef.  He would eat it all the time but me...not os much.  He has got to me like steak and we cook that a couple of times a month.  I don't really like hamburgers that much.  I like them at places like McDonald's and In-N-Out because they are super thin.  If somewhere has a fat patty,  I can't handle it.  I also like Taco Bell's "beef" which is ironic because a couple of months ago there was a lot of talk about Taco Bell and how it's beef is actually so little beef, that people were getting mad that they were calling it beef.  Um, gross.  But at the same time explains so much why I can actually eat there's.

Any ways.  We get tired of cooking chicken in the same ways over and over again.  We found a recipe that we tried and it was really good so I thought I'd share it with you.

You get some chicken breast.  Either you can get thin sliced OR you can take whatever chicken breast you have and pound them thin.  Then you put a piece of cheese in the center.  The recipe said to use Kraft singles which I liked but my husband didn't.  The second time we made it we used sliced provolone which was good too.  So use whatever cheese you think sounds good!  You then roll the chicken up around the cheese ( which is why you want the chicken to be thin ) and then you wrap a piece of bacon around the entire thing and close it with a tooth pick.  The missionaries from our church were coming over for dinner when we tried this and we told them we were experimenting on them, which I am sure they LOVE to hear.  haha   Then we told them what it was and the one missionary said you can't go wrong if you wrap something in bacon!

Next you take these bad boys and either throw them on a grill, skillet or frying pan.  We just fried them on the frying pan.  Do each side for a couple of minutes.  I kept flipping them every 5 minutes or so.  Having a lid on helps.  When the chicken are starting to look cooked, you take some Balsamic Vinaigrette dressing and dump it all over the chicken.


MMMMMMMM  I'm telling you this meal was pretty tasty.  Cooking chicken always makes me nervous so we used the thermometer and made sure it was at least 160 degrees before eating.  One thing I learned from Doctor Oz ( who knows Dr. Oz and LOVES him!? )  If you freeze your chicken it kills 99% of bacteria so I ALWAYS freeze my chicken just in case.


So just remember, wrap thin chicken around a piece of cheese, then wrap with a piece of bacon and fry.  Dump some dressing on at the end and eat!  The dressing really soaks into the chicken and makes it super yummy and moist.  My only complaint is that the bacon doesn't crisp up and cook very well. The second time we made this I cooked the bacon in the oven for about 10 minutes before wrapping and it helped a little but it still didn't cook as well as I would have liked.  My husband liked it just fine so it's just a matter of preference.

And one more thing!  VERY important!!!  The recipe reminds you to take out the toothpicks before serving.  haha  Thank you recipe for making sure I don't eat a tooth pick!  Now go make this and enjoy.

Wednesday, December 14, 2011

Favorite Quick Cookies

I can not remember if I have posted this recipe here on my blog or not so I thought I would write a quick post today.  I know a lot of people are baking like crazy around the holidays.  If you are in need of a quick and easy but SUPER YUMMY cookie recipe give this one a try.

Easy Chocolate Chip Cookies

1 cup brown sugar
1 stick of butter
1 egg

Blend together until smooth

Add 2 cups Bisquick ( you know, the pancake mix! )

Then add whatever goodies you want.  I always add white chocolate chips or regular ones.  My mom also adds walnuts but I don't like those so I skip them.  These cookies are SUPER easy and SUPER yummy.  The Bisquick gives it a great flavor and you only have to remember 4 ingredients.  What is not to love about that?  I also like to add flax seed because I like to add that into anything I think I can sneak it into.  So give it a try.  Let me know how you like them if you try them.  Oh yeah and bake them at 350 for 10 to 12 minutes ( depending on how small or big you make them )

Oh and just a trick my mom taught us growing up that I LOVE to do is before you take them out of the oven, I cut open a brown paper bag ( I swear grocery stores STILL carry them, you usually just have to ask )   Lay the brown paper bag out flat on the counter and when the cookies are still hot transfer them onto the brown paper bag and it drawls out any of the extra oil and grease.  

ENJOY and I will try and get some actual crafts up here soon.

Friday, December 9, 2011

A Soup Recipe JUST for You

Man has it been COLD here!  The other day I went to take my son to school and I noticed that the water bottle in my car was frozen.  It wasn't frozen solid but it was pretty close.  My husband is one of those people who only enjoys soup when it's cold.  I will eat it ANY time because, well, it's so yummy.  Since it was cold I really wanted to make soup.  I busted out a recipe and changed it up a bit.  Want to have it?  I thought so...

Potato Cheese Broccoli Soup

4 potatoes ( washed and peeled and cut up )
4 cups of water
1 onion OR onion powder
A can of cream of chicken soup
A head of broccoli
Carrots
A block of sharp cheddar cheese

Boil the 4 cups of water and cut up potatoes for 10 to 15 minutes.  I stir occasionally so nothing sticks to the bottom.  If you are an onion person add some chopped up onion now.  I HATE onions so I opted for some onion powder.  I put about one teaspoon or so into the pot.

Next you want to add a chopped up head of broccoli.  The amount you put in is up to your person preference.  I also take carrots and shred them straight into the soup with a cheese grater.  You can also add celery if that sounds good but I usually don't do that.  Add a can of cream of chicken soup.  I couldn't find my recipe when I made it the other day so I added two small cans and it turned out super yummy.  Next I shred up a block of sharp cheddar.  THIS made a big difference for me.  the recipe calls for half a block of velveeta which taste great BUT the soup never seems to heat up well.  This time I did the REAL cheese and it heated up perfect.  Again it is up to you though.  keep stirring.  If you like soft broccoli you might want to add the broccoli in towards the end of your 10 to 15 minutes of boiling the potatoes.  This will help make them softer.  Once everything feels soft you are done!  I stir quite a bit at the end because if you don't it sticks to the bottom and then burns.

So how do you serve this?  My FAVORITE way to serve this is with sour dough bread bowls.  Let me tell you, I HATE soup dough.  I don't like it at all but for some reason it rocks my world with this soup!  I tried doing regular old french bread with it once and was so disappointed at how different it tasted. I like to cut off the top of the bread soup, scoop out the inside and then stick it in the oven with some butter and garlic salt sprinkled on.  I even butter and sprinkle garlic salt on the lid and use that to scoop up soup.  If you can not find bread bowls I sometimes just get the sough dough loaf and then cut it up into strips and butter and add the garlic salt to those.

Want to see the soup?


yeah, I forgot to take pictures.  Trust me when I say it was fabulous! And here is what I did to the sough dough loaf to make it easier to dip in my soup ( and yummier! )


Sorry for the horrible pictures.  I took them with my cell phone.

So don't think I am not posting because I have given up on blogging.  I have not had much time and when I do have time and TRY to write a blog my internet quits working.  It has been SUPER frustrating for me.  Something got messed up between my lap top and our router and it kicks me off constantly but it NEVER kicks my husband off.  So I could just use his lap top right?  Not really because ALL of my pictures are on MY lap top.  I am hoping to get this resolved at some point because it is driving me nuts.  I have some projects to post and I am hoping to get some up right now since the internet seems to be working.  Here's hoping...

Wednesday, August 24, 2011

Yummy Dessert

Last night we had the missionaries over from church for dinner.  I wanted to make something EASY for dinner and dessert.  I LOVE what I ended up making so I thought I'd share.  It is so easy too.  Here's what you need

Some kind of concentrate juice ( I choose pink lemonade and it was AWESOME )
vanilla ice cream
cool whip
butter ( Ironic after I just wrote about butter...)
grahma crackers
a little sugar

Here's what you do.  Take about half of a thing of vanilla ice cream and a can of juice from concentrate and put them in a bowl to melt together.


next take about half a thing of cool whip ( I wanted to save a little to go on top after it was done! ) and mix the cool whip, and the new ice cream mixture in a blender.  I did this just so that there weren't any ice cream lumps.  You could also do it in a standing mixer I am sure.

Next take your graham crackers ( I took two packages but mine was a little over kill ) and put them in a zip lock bag and beat them to death!


Take your rolling pin and roll out the chunks that did not break up.  Next add about 1/4 cup of sugar.  You can add more if you want it to be super sweet but mine was fine was just the 1/4 cup.  Next spread the graham cracker mixture in a pie pan on a cake pan.  Melt about 6 or so tablespoons of butter and pour on top of the graham mixture.  Mix this well and smash it to the pan like a pie crust.  Next pour the ice cream mixture on top and them stick it in the freezer.  I took it out while we were eating dinner so that it would soften slightly and then I cut it up and added a little spoonful of cool whip on top!  IT WAS SO YUMMY!  I loved it and the sour pink lemon aid was PERFECT with the graham cracker.  I have also done this with a strawberry daiquiri and it was amazing too!  Try what you like but TRY IT!  It's such a good dessert for an easy but yummy summer dish!

Thursday, July 14, 2011

Thankful Thursdays

I am thankful for recipes!  I would be SOOOOOO lost without recipes.  I wouldn't know how to cook anything at all and I would be SO scared to try anything.  Recipes get us familiar with what ingredients are good for certain things.  For instance, who would have though that honey would be good for your skin?  I would NEVER have thought,  "Hmmmm I think if I rub sticky honey all over my face and then leave it there for a few minutes and wash it off....I bet it will make my skin nice and soft!"

Well, I got a recipe for YOU!  I haven't tried it yet.  I was cleaning just now and saw it and thought, "Oh yeah I forgot about this."  I got it at church.  The ladies had a spa night and this recipe was give to us along with a chocolate bar.  Here are the ingredients

1/3 cup of cocoa
2 tablespoons of heavy whipping cream ( sour cream will work too! )
3 tablespoons of oatmeal powder ( I just throw oat meal in the food processor )

Preparation

Mix all the ingredients until the mask is consistent.  Apply on the face, gently massaging it so that the oatmeal can start exfoliating the dead skin cell layers.  Leave it on for about 15 to 20 minutes and then rinse off with lukewarm water.  ENJOY YOUR SOFT FACE!

Wednesday, June 29, 2011

HELLO

We are in Utah having a great time.  I do not have internet on my lap top since I am not at home which means not much blogging for me since my pictures aren't on my moms lap top.  BUT we are having a great time and enjoying soaking up some sun!  So I don't neglect this blog for TOO long I have a simple and YUMMY recipe for all you folks who are grilling this summer.  It's is stuffed Jalapenos.  I have not tried them yet but my family raved about them.  My sister Kim found the recipe.  Here is what you need

1 lbs chorizo
10 big jalapenos
bacon
cheese

mix chorizo and a little bit of cheese.  Cut jalapenos and de-seed them.  Stuff with the chorizo and cheese mixture.  Close the jalapeno up and wrap it with a piece of bacon and secure it together with a tooth pick.  Next throw those puppies on the grill and enjoy!  Like I said, I haven't tried them yet but my sister made them for my family one time and they LOVED them!  I am hoping to make some when we get back to Cali!  Enjoy your 4th of July and hopefully I'll be back in a couple of days to post some more.

Wednesday, June 22, 2011

Chocolate Cinnamon

Doesn't that sound yummy?  Chocolate cinnamon.  Well, it at least sounds yummy to me!  I FINALLY got around to using some of my empty chap stick tubes.  I also finally used the deodorant tubes I bought!  WOO HOO.  I am leaving tomorrow to drive to Utah AGAIN.  I have been promising my mom and dad some chocolate chap stick.  This time I wanted one with some Bees Wax in it.  I looked up some recipes and then adapted one for my liking.  Here is what I did.


Chocolate Cinnamon Chap Stick


1 Tablespoon Cocoa Butter
1 Tablespoons Sweet Almond Oil
1 Tablespoon Avocado Oil
1 Tablespoon Olive Oil
1 Tablespoon & 1 teaspoon Beeswax
5-7 drops Cinnamon essential oil 
6 to 10 chocolate chips


I should have entered a drop or so of Vitamin E and I forgot!  I think this is plenty good for your lips without it though.  

Here's what you do.  Bees wax takes a while to melt.  You want to take the bees wax, cocoa butter, sweet almond oil, olive oil and avocado oil and melt them together.  Do this either in 10 second increments in the microwave or use a double broiler.  Once the bees wax is all melted into the other oils you want to add you essential oil.  If using Cinnamon it is VERY strong.  I only used about 4 or 5 drops but I could have used a couple of more.  I would rather have too little then too much though.  Then add some vitamin E if you would like.  Stir in the chocolate chips until they melt.  I used 6 of them and again you could use more.  Whatever you would like.  This is just to add some flavor and to add some color.  Don't let it cool TOO long before pouring into whatever it is you have to hold it in.  I used my empty chap stick tubes and it took up about 9 to 10 of them.  


And here is the deodorant in their cute little roll up tubes


I can't WAIT to roll this on instead of using my finger!  WOO WOO for all natural home made products that won't cause harm or cancer!  YEAH BABY! 

linking up to

Watcha Working With @ It's Toile Good


Monday, June 20, 2011

Confessions of a Pizza-holic!

I LOVE pizza!  Like.....LOOOOOOVE pizza.  I could eat pizza everyday for a week if it was from a different place every time.  I got really into making my own pizza about 2 years ago.  For a long time I just used the same recipe over and over again.  I didn't try anything new or play with it.  I kinda get scared to experiment.  Since we moved from Texas to California and I have no life ( no seriously haha ) I have taken up baking.  I have baked and baked and BAKED since I moved.  I am so glad I did not gain all the weight back that I have taken off since I had my last baby.  It has been nice getting to know the kitchen better and trying new things AND experimenting!  One thing I finally decide to mess around with was our pizza recipe.

Before moving onto my tips and tricks, I wanted to start off by telling y'all that I REALLY try to bake with whole wheat.  My pizza recipe that I used called for half wheat flour and half white flour.  I wanted to try and find one that was ALL wheat. It was nearly impossible.  After discovering white wheat, which has been my savior in the kitchen, I usually use half white wheat and half wheat flour.  For those of you who have no clue what white wheat is LOOK IT UP!  You won't be sorry.

After many attempts at baking different kinds of pizza, my friend Sarah bought me a Whole Grain cook book for my birthday back in April.  It has been wonderful.  I have picked up a few things from it.

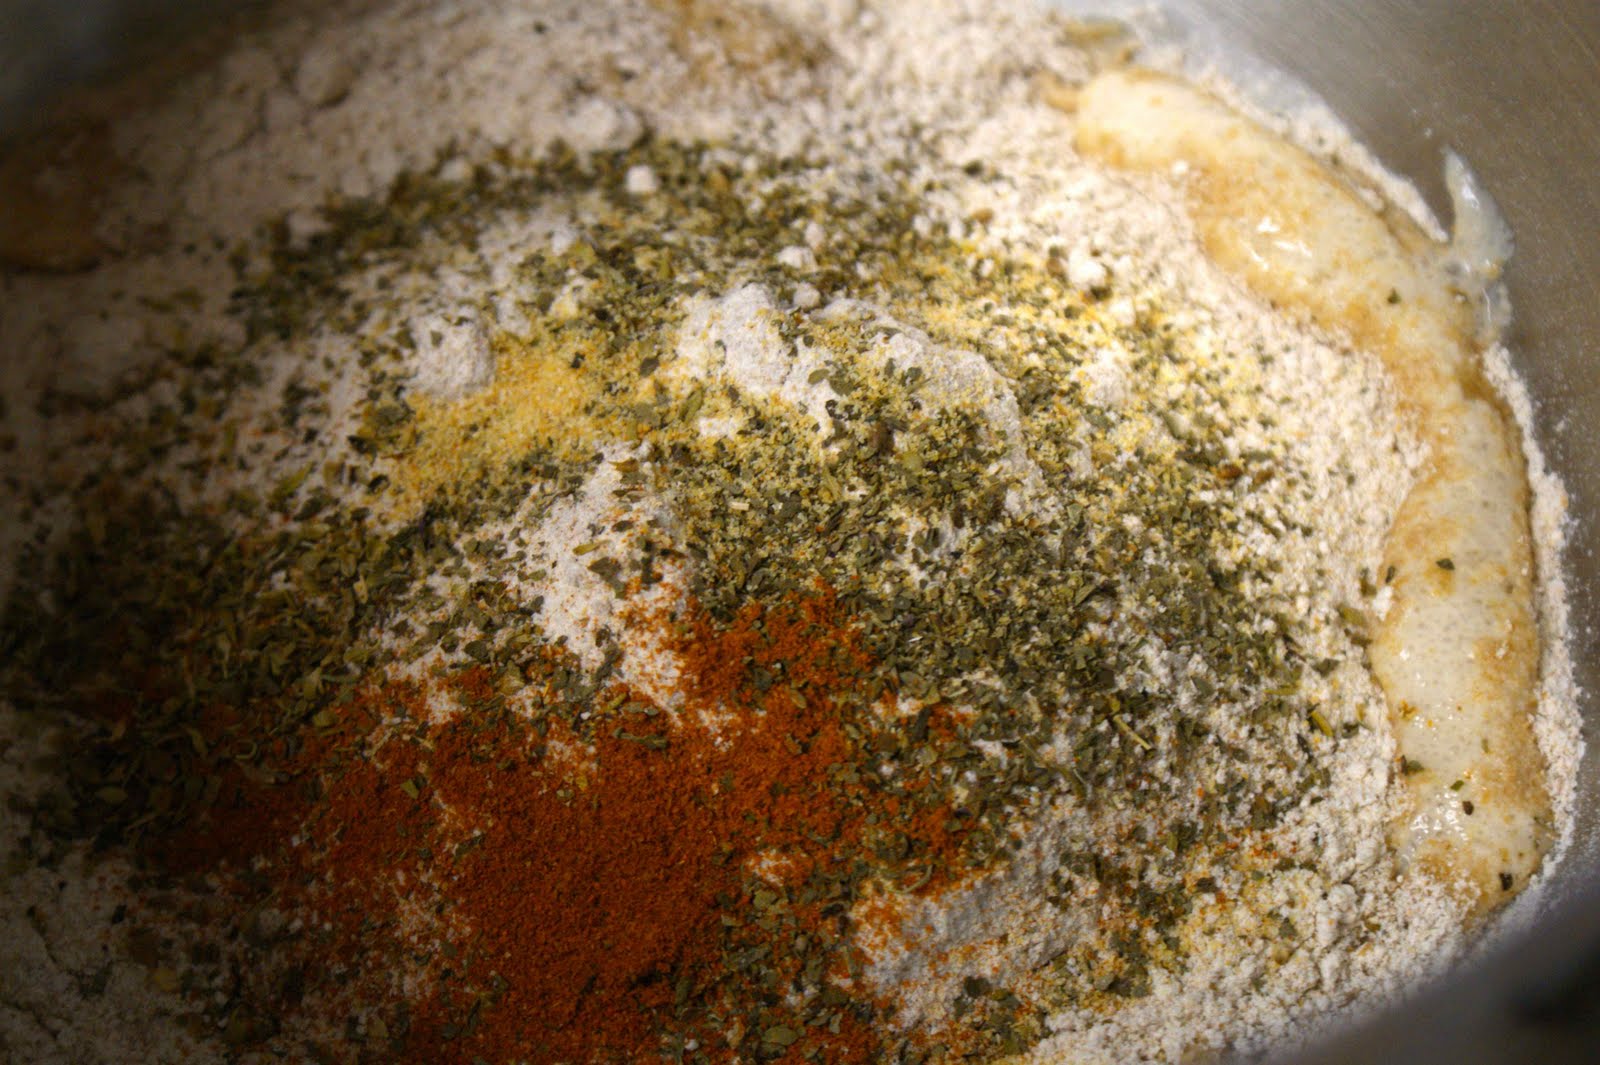
ONE-  they have several different recipes for pizza dough.  One thing I LOVED from one of the doughs was to add dry basil, dry oregano and some cayenne pepper to your flour mixture.  Um can we say YUM!  I have since started adding in some garlic powder too.  Let me tell you this gives the dough a great flavor.


TWO-  if you have cooked any kind of bread or rolls before you have been told to put a wet tea towel over the dough while it rises.  I have done it a thousand times.  My cook book says it used plastic wrap instead and I have to tell you that every since I started doing that my dough rises better and faster.  SCORE!


THREE- Before I roll out my dough I put down a layer of Semolina Flour on the baking sheet or pizza pan.  This makes the pizza crust, well CRUSTY!  I LOVE this.  The first time I did it I hadn't realized my pizza wasn't crispy before.  Now I do this and my pizza is wonderfully crusty on the outside but still extra soft on the inside.  You can also use corn meal but I like the semolina flour because it's more like really soft sand and isn't as corse ( in my opinion any ways )


FOUR- I roll my pizza out, poke it with holes with a folk so it doesn't get huge air bubbles in it and then I rub some olive oil on it to crisp it up.  Then I put it in the oven at about 400 degrees for 5 to 6 minutes.  This helps the dough cook up all the way.  The thing with pizza is the toppings don't really need to "cook" and cheese does not take long to melt.  Sometimes I need my crust to cook longer then planned and the mozzarella ends up burning a little.  So take your time cooking the dough before topping it.

FIVE- pull it out of the oven and put on your toppings.  I like to put down cheese then toppings, then sprinkle more cheese on.  I also like to use lots of different kinds.  Lately I have been into putting on provolone, then mozzarella, then some pepperoni and olives ( or Jalapenos ) and then a little cheddar and Parmesan.  I don't used powdered Parmesan either.  I can't STAND the smell of it.  I use fresh kind.  Put it in the over for another 8 to 10 minutes or until everything is nice and brown.

SIX- I pull the pizza out and immediately I spread melted butter on the crust and then rub some garlic on it.  It makes it SOOOOOOOO good.

Here is a recipe I have found that I love.  I have added some things to it but for the most part it was perfect the way I found it.  Try it and use my six steps and you will NOT be sorry!  Oh and of course ENJOY!

Pizza Dough

1tsp white sugar
1 Tbsp active dry yeast
1 1/2 cups warm water ( not too hot or you will de-activate the yeast! )
1 Tbsp olive oil
1 tsp salt
2 cups whole wheat flour
1 cup white wheat flour
1/2 tsp dry oregano
1/2 tsp dry basil
1/4 tsp cayenne pepper
1/4 tsp garlic powder ( or garlic salt )

dissolve sugar in warm water.  Add yeast and let rise for about 10 minutes until nice and foamy.
Stir in olive oil and salt into yeast mixture and then add wheat flour and half of white wheat flour.  Also add basil, oregano, cayenne pepper and garlic powder.  Mix until the dough seems to be together.  Add as much remaining flour as you can.  If dough seems SUPER sticky, add more.  Dough should be soft and not overly dry.  Use dough hook on mixer or knead the dough by hand on a lightly floured surface.  Place dough in an oiled bowl and cover with plastic wrap.  Let rise one hour or until dough has doubled.

Now here is where you can do two things.  One you can roll out the dough now on a layer of semolina flour on a cookie sheet or pizza pan ready to cook.   OR you can let it rise a second time.  It depends on my mood and how much time I have.  Usually I don't let it rise again.  This dough is pretty thick so I spread it out pretty thing because it expands even more when you cook it.

Now you just need to follow steps four, five and six and you are good to go!  I usually set my oven to 400 and cook the first time about 7 minutes and the second time 8 to 10 minutes.  I used to have my oven set at 500 but found that the inside of the dough wouldn't cook all the way.

Let me know if anyone tries this.  I cooked it tonight and it was excellent.  Sorry I didn't take a picture of the finished product but take my word for it, it was YUMMY!  I love this too because for the most part it is pretty healthy.  You are getting lots of fiber and depending on your toppings this can be a great source for some veggies.

One thing I didn't talk about was sauce.  I make mine.  Again this depends on my mood.  USUALLY I take a can of organic Italian style tomatoes and throw them in my food processor with a small can of tomato sauce, some garlic and some olive oil.  If you only have a regular can of tomatoes, then just throw in some dry basil and oregano in place of the "italian style" tomatoes.  It's pretty much the same thing.  Then I blend it until smooth but I know some people like chunky sauce so just do what you like.  This is a pretty sweat tasting sauce.  If you want it to taste more like a pasty sauce like you would get from Pizza Hut, then don't use can tomatoes and just use tomato sauce, basil, oregano and some garlic.  Both are delicious.  In fact the first sauce I gave you directions for is what I use when making any kind of pasta.  We love it!

One last thing, ENJOY YOUR PIZZA!  I know we do.


Linking up to Tuesdays at the Table


Tuesday, June 14, 2011

Smoothies

My baby girl and I have been enjoying fruit smoothies for breakfast in the morning.  When I say smoothie I really mean HEALTHY smoothie.  Not all smoothies are that healthy!  I used to think I was making healthy ones because I used low fat non fat ICE CREAM and apple juice!  YIKES!  Now I REALLY make HEALTHY ones.

This mornings smoothie was
5 strawberries
10 blue berries
5 raspberries
a hand full of spinach leaves
about 3 or 4 baby carrots.

Sounds really weird right?  Carrots and spinach throwing you off?  Let me tell you, they cut out all of the sweetness of the fruit.  I added a little bit of water too.  Sometimes I add flax seed.  If I add flax seed I try and drink it all.  The flax seed blows up if you freeze it and then defrost it.  :) Sometimes I also add low fat plain yogurt.

Sometimes I also add bananas, oranges, peaches and apples.  I HEARD broccoli doesn't leave a taste in the smoothie either but I haven't tried it yet.  I SWEAR to you you can NOT taste the carrot or the spinach.  Try it.

My daughter LOVES sharing these with me.  She says, "I want fruit momma!"


This is right after she enjoyed the one from this morning.  Can't argue with that face!  Enjoy

Friday, May 20, 2011

Your Mouth Will Thank You

Take some of these


Cut up the cheese and place it on the crackers like so ( the thicker the better if you love cheese like I do )


Microwave about 15 to 20 seconds ( depending on how thick your cheese was! )

And enjoy!


The Triscuits come in so many yummy flavors.  One of my favorites is actually the fire roasted tomato and garlic.  Those are AMAZING!  This is of course not a South Beach Diet Approved snack.  It is however, a Katie is on her period and needed something more then a salad snack!  :)

Oh and by the way, you're welcome!

Thursday, May 19, 2011

Brazilian Cheese Rolls {Pao de Queijo}

My husband went on a mission for our church in Brazil.  He loves Brazilian food!  The Brazilian BBQ places are SOOOOOO expensive.   I have never gone to one with him, he usually goes by himself.  My brother in law Ender also went to Brazil on his mission, therefore my sister tries to find different Brazilian dishes to make them and then I get to hear which ones are good.  The other day we made Brazilian style steaks.  SUPER easy.  You take your steak and you rub kosher salt ( or any salt you have ) all over it.  Then you drizzle olive oil on it and rub smashed up garlic on it.  Let it marinate for a couple of hours and then grill it.


My husband said that when they would do this in Brazil they would use rock salt and after it was cooked you would gently knock the salt right off of it before you ate it.  I thought this way was good.  My husband just ordered a grill and is SO excited to try this again so we can actually grill it.  We used our tiny little Foreman grill. hee hee

NOW for the WOW recipe.  I didn't take pictures because I was making these in a hurry last night but if you like cheese bread you have to try these.  It's called  Pao de Queijo or you can just say Brazilian Cheese Rolls.  They are SO yummy.  You have to use the ingredients provided though.  Substitutions don't cut it!  You HAVE to use tapioca flour and you HAVE to use canola oil.  My sister used vegetable oil once and they were almost un editable.  So be careful and have fun.  These are super easy and super yummy.  Another MUST do is you have to cook these in a mini muffin tin.  No exceptions.  I got the recipe off of Our Best Bites.  GREAT blog people with tons of ideas and recipes.


Quick Brazilian Cheese Rolls {Pao de Queijo} – Gluten Free!
Recipe by Our Best Bites
1 large egg
1/2 cup milk
1/4 cup canola oil
1 cup tapioca flour (sometimes labeled tapioca starch) no substitutions
1/2 tsp kosher salt
1/4 C grated cheddar cheese* (preferably medium or sharp)
1/4 C grated Parmesan cheese
*you can play around with the cheese.  I’ve used Monterey Jack, low-moisture mozarella, swiss, and even gruyere in place of the cheddar.  All great!
Optional:  extra cheese to sprinkle on top and any herbs/flavorings you’d like to add.  Try rosemary and or garlic powder, my favorites!
Preheat oven to 400 degrees.  Place egg, milk, oil, tapioca flour, and salt in blender and blend until smooth.  Add cheeses and pulse 2 times.  Immediately pour batter into a mini muffin tin (if your muffin tin isn’t non-stick, spray lightly with non-stick spray first), filling each well about 3/4 full, or just slightly less.  If desired (and I recommend), sprinkle a bit of parmesan cheese on top and/or a tiny sprinkle of kosher salt.
Bake for 15-20 minutes until puffed and golden.  Remove from oven and cool for a few minutes before removing rolls from pan.  Serve warm. {Que Gostoso!}  These actually don’t re-heat well so I recommend making and eating fresh.

If you want to see their whole post with pictures and all check it out HERE
You will not be disappointed if you make these!  They are soft and gooey on the inside and crunchy on the outside.  It's fabulous! 

Monday, May 16, 2011

Crackers

I went CRACKER CRAZY this weekend!  I needed to bring a snack to church for the nursery and instead of bringing store bought graham crackers or fishy crackers, I decided to try and make some.  On my search to find other graham crackers recipes I read a lot of different things.  This led me to find other crackers recipes and go a little crazy.  I ended up making graham crackers, "ritz" crackers and fishy crackers.  The fishy crackers were good but not EXCELLENT.  Part of that was my fault.  I only had low fat cheddar because of my south beach diet and so it was as cheesy tasting as they should be.  The good thing though is that is recipe has spinach and carrots in them and I SWEAR you can NOT taste them.  This makes them perfect for picky kids who don't eat veggies.  The dough is really simple.  You basically put everything in the food processor.  Then you chill the dough for a couple of hours, roll out and cut out the fishy.  This part is tricky.  I wanted them to look like fishy crackers so I had to make a cookie cutter.  I cut open a soda can to shape myself a fishy.  It took three tries because I kept breaking the aluminum.  :)  By the way, NONE of this was my idea!  I stole it all from the source I found the recipe.  I will post a link at the bottom of this post so you can check it out.  The only modification I did was I added some pepper jack cheese which I wish I would have added more of because I couldn't taste it.  So here is my pictures!


LINK HERE  Get the recipe by clicking on the link.  Also I did two batches of these puppies and the first batch I thought I over cooked.  So the next batch I took out sooner.  The "over cooked" ones ended up having the crunch you want in a crackers and the others ones were more like bread dough.  The crunchy ones were better!

Now for the ritz crackers.  I messed this up because the dough is SUPER springy!  I didn't roll mine out thin enough.  It was HARD to get it thin.  Then they also cooked up in the oven which I didn't think they were going to do.  SOOOO the ones that came out thin were good and did have some crunch to them.  The thick ones taste more like biscuits  which are still really yummy, but aren't ritz cracker like.  So make sure you roll them out REALLy thin when you cut them out.  I just used something round and then poked holes in them with a tooth pick.  I didn't take pictures of these but they are worth a try.  Here is the recipe for those RITZ RECIPE  ( awesome blog if you just poke around on here site.  She also has a fishy cracker one with no carrot or spinach in it if you are scared to try that! )

And lastly was the graham crackers.  I made these before and thought they were very good but I wished they had a little more flavor to them.  The recipe is found HERE  After reading several other recipes I changed a couple of things in this recipe.  I did half white sugar and half brown sugar.  Plus I let my 1/4 tsp of cinnamon turn more into a 1/2 tsp.  I also added a few dashes of pumpkin pie spice!  YUM!  That's it.  I think they were for sure more flavorful.  Still not perfect for my tasting but much better.  I like things sweet though so for those who don't like things sweet you probably want to stick with the original recipe.   So go try some cracker recipes.  

On a side note I ALWAYS try and give you guys a link if I got an idea from someone else.  Even if I changed the recipe like in the above crackers.  Please let me know if you feel I took something from you and didn't give you any credit.  I HATE when others do that to me so don't let me do it to you!  Thanks. Hope everyone had a great weekend.

Wednesday, May 11, 2011

Deodorant Re-mix

I tried a new home made deodorant recipe and I must say I am LOVING it!  I found it on Angry Chicken but then I adapted it a little bit.  Here is the original recipe


Homemade Natural Deodorant

3 Tablespoons shea butter
3 Tablespoons baking soda
2 Tablespoons corn starch
2 Tablespoons cocoa butter
2 vitamin E oil gel caps (puncture and squeeze out the oil)
Essential Oil (I used ylang yang and orange)

NOW here is the version that I made and I LOVE
3 tablespoons shea butter 
3 Tabelspoons baking soda
2 tablespoons corn starch 
2 tablespoons of coconut oil
about 5 or so drops of vitamin E oil
about 5 or so drops of Lavender
about 5 drops of tea tree oil 

LOVING it!  It is much easier to apply then the original one I posted that was just coconut oil, baking soda and corn starch.  How you make it is you take the shea butter and coconut oil and stick it in the microwave for a few seconds to soften them up.  Stir in the baking soda and corn starch.  Stir until it is all mix together and then add the essential oils.  You never want to mix the essential oils in before you heat the mixture in the microwave.  You wait until the last step to add them.  mix it all up and enjoy!  It's wonderful!

Monday, May 9, 2011

Bow Ties

My sister had her first mother's day with her son today!  Ironically, her husband is out of town and it is her first time as a single mother as well.  She REALLY wanted her boy to look super handsome for church so she asked me to make him a bow tie.  Her and her husband are being sealed to him in the St. George Temple later this month and she wanted me to make him a bow tie for that as well.  SOOOOO after I was done with my sister's purse on Wednesday I made Jacob a bow tie with some of the left over fabric.  MAN are these fake bow ties easy!  I think I may make a couple this week for my etsy shop.  Check out how cute it turned out


My sister sent me a picture of him wearing and so I was going to attach it but apparently I am not smart enough to figure out how to forward it to my email!  Ha  Oh well.  I'll get her to send it to my email and get it up here later.  Back in February or March I made my other nephew a tie for his birthday and his mommy sent me a picture too!  It was also so cute and I TOTALLY forgot to post it so I'll post the two together.

So how was everyone's Mother's day?  I got awoken at 7 in the morning by a lovely text from one of my friends.  Then we went down stairs and ate breakfast at the hotel we were staying at.  We were in Las Vegas on our way back to Cali.  Our girl was fussy and didn't want to eat anything but she drank a bunch of apple juice.  We were kinda annoyed but we needed to get going.  We got on the freeway and about two exits later she pukes ALL Over herself and her car seat!  BOOOOOO  I guess it was a reminder for me what being a mother was all about!  :)  We made it home in one piece and no more throw up.  We stopped at the store on the way home to get some groceries sine we knew we didn't have any at the house and it was packed!  TONS of people barely buying flowers and cards at 2pm!  Come on people.  SO glad we don't normally shop on Sundays because it was a mad house.  We got home and unpacked the cars which quickly destroyed my almost clean house.  I was going to make pizza but I decided we should just order it instead.  I hopped in the shower while my husband got on line to order pizza but the place here where we lived was closed for Mother's day.  I told my husband, "Don't they know Mother's day it should be opened because we all want a break from cooking!"  I mean, come on.  So I made pizza instead and it was very good.  I found a recipe that is very interesting and yummy.  YOu use a mix of white wheat and regular flour and you add dry basil, dry oregano and some cayenne pepper!   It was very interesting but in a good way.  If you make pizza as much a sI do you should give this a try.

Tonight I am going to attempt to start the south beach diet again.  It's time.  It seems every couple of months I get off track and need to start fresh and this is certainly that time!  So maybe I'll have a new recipe to share this week.  We shall see.  Happy Monday Y'all!

Friday, May 6, 2011

Birthdays

It was my sister and Dad's birthday on Wednesday.  My parents tried for years to have kids and after considering adoption they found out my mom was pregnant.  She gave birth to my sister Kristy on my dad's 30th birthday.  May 4th.  We celebrated and it was fun!  We started off with lunch.  I had my boy Tyler take a picture of us at lunch and he took the best picture.  Perfectly centered and my camera is BIG.  I was impressed.


This is my sister Kim, our friend Liz, Kristy, Me and Kayla.  Kayla was wearing her skull dress I made her.  :)  Then my sister Kim and I took the kids to the mall and bought cards and a gift card for my dad.  Then I went back to my moms house and finished my sister's present!  She loved the birdie sling purse I made my mom and I so my mom bought her some cute fabric and then had me sew it.  It turned out really cute.


The last picture is of the inside.  We made Tacos and chocolate cake but it wasn't just ANY chocolate cake.  It was a chocolate chocolate cake!  YOu take a box chocolate cake mix ( or make your own chocolate cake from scratch )   Then you take a cook and serve vanilla pudding and make it according to the box directions and add it to the other mix.  Cook at 350 for 20 minutes.  Take it out of the oven and dump a whole bag of chocolate chips right on top so they melt.  Then you add walnuts!  Me and the kids don't like walnuts so we did half with and half without.  Check it out


Kids loved it too!  Funny because I was planning on making the cake but I was making taco shells for dinner so my dad ended up making his own cake!  But I did make some home made whip cream and we bought some vanilla ice cream to go with it.  It was delicious.  We also got a slip n slide for the kids to use out side.  They had tons of fun.  Baby Jacob had not be in a sprinkler before.  He loved it and it only took him a couple of minutes to realize that if he leaned forward he could drink the sprinkler water.


Then Kayla had a bath and RIGHT when she was getting out of the tub her Daddy for to my parents house!  We hadn't seen him in almost 2 weeks and the kids were SO excited.  It was a fabulous day all around.  Happy birthday Kristy and Dad!  Hope it was as enjoyable for you as it was for the rest of us.

Friday, April 29, 2011

Green Smoothie

I have been making smoothies lately to help me in the working out and TRYING to lose a little more weight.  I make a thing of them every other day and break it up into two smoothies.  I either drink it right after I work out or right after the kids go to bed ( the two times of the day it is the hardest for me NOT to eat junk. )  Mine is a berry smoothie.  It's pretty good.  Milk, yogurt, blue berries, raspberries, blackberries, strawberries and flax seed.  Sometimes I get crazy and throw a spoonful of whip cream in there.  We had bought a little thing of it and I was trying to use it before it went bad.  Honestly, it doesn't make much taste difference so why put it in.  Sometimes I throw a banana in there.  I was reading through my blog list updates this morning and saw THIS on Elle Apparel and I am SO gonna have to try this when I get back to Cali.  At the moment we are still in Utah.  Today we are heading to Cedar City to see my in laws and hang out with them.  It works out good because my mom and dad usually work on weekends and the weekends are the only days my in laws have off.

Yesterday I took my girl to get her first hair cut.  She did AWESOME.  I don't have my pictures on my lap top yet.  HOPEFULLY sometime in the next week I will be getting my hair cut too because it is driving me insane.  After we got Kayla's hair cut when we to the park and ate pizza and then my sister and I went thrift store shopping and then to Walmart to buy stuff to make dinner.  We made chicken enchiladas.  They were super yummy.  Then I made some home made brownies.  They turned out okay but I was hoping they would be awesome.  My mom and dad's cocoa was old and you could taste that in the brownie.  I was disappointed but everyone else thought they were good.  They were nice and moist though which I LOVED!  If you want to try the recipe check it out over at HERE over at Sugar Bananas.  I went to her blpog and clicked on dessert.  BIG mistake!  haha  I wanted to make everything I saw.  My next ( If I have the time ) is here Lemon Berry cake.  It looks amazing.

OKay enough babbling for today.  I have some crafty stuff happening soon but until then have a fabulous weekend!

Wednesday, April 20, 2011

Wheat Tortillas

How many of you guys like home made tortillas?  I DO!  I LOOOOOVE them.  I LOVE when you go to a restaurant and you can just tell they make their own tortillas.  The problem with restaurant tortillas is that the white ones aren't so healthy.  I LOVE wheat ones if you get the right kind.  I love all the added flavor and fiber.  MMMMM FIBER

My dear friend Sarah sent me a cook book for my birthday a few weeks ago.  She knows every since she got me hooked on the south beach diet I have been more and more into cooking with wheat flour.  I was BUYING wheat stuff before.  Wheat pasta, wheat bread.  But I wasn't really making my own.  I would make wheat bread that was good.  When we moved here to California a few months back I was bored!  No  friends does that too you.  So I started baking.  I am both happy and mad about this. Happy because I love home baked goods and sad because my pants are getting tighter and tighter.  The book my friend bought me called Whole Grain Baking and its a King Arthur Flour recipe book.  I am going to share with you the wheat tortilla recipe.

Whole Wheat Tortillas

2 cups white whole wheat flour
1/2 teaspoon salt
3 tablespoons vegetable oil ( I used olive oil and didn't see a difference )
2/3 cup warm water

Mix all the ingredients together and knead for 5 minutes.  Cover and let rest 20 minutes.
Break the dough into 10 to 12 little balls.  Cover and let rest another 20 minutes.
Take out one of the dough balls and roll out as thin as you can get it with a rolling pin.  Put on a skillet or frying pan on medium heat.  Heat each side for about a minute each.  Then keep flipping over until brown spots start to appear.  This is the fun process.  While the one is cooking, roll out the next one but make sure to keep the rest covered so they don't dry out.  Repeat until all of them are cooked.


uncooked

 starting to cook


the rest ready to go

MMMMMM tortilla goodness. I have made these three times now.  I made burritos with them the other night and tonight we made tacos.  Try them out.  If you have not had wheat tortillas before you might not like the difference.  For me they are WAY more filling and the health benefits out weight the flavor difference.  Melt some butter on them or make a quesadilla.  These puppies are a hit for me and I am going to keep on baking them and trying new variations.  Next I think I am going to try adding garlic salt and some cheese or something.  I was trying to think of all the different kinds they have in the store.  We'll see how that goes.

Peanut Butter Cookies

My family LOVES peanut butter.  We also love cookies so what better invention for us then the peanut butter cookies?   I don't make then tons because I would weigh 400 lbs!  But yesterday I was in the mood.  However, I wanted to make them healthier if it were possible.  Let me tell you it was possible!  I used white wheat flour instead of white flour and I put ground up flax seed in it.  Since flax seed is kinda nutty it's a perfect fit.  You can't tell one bit that it is in there.  Want to try them?

Peanut Butter Cookies

1/2 cup butter
1/2 cup peanut butter
1 cup brown sugar
1 egg
1 cup white wheat flour ( or wheat pastry flour )
3/4 tsp baking soda
1/2 tsp baking powder
1/4 tsp salt
1 to 2 tablespoons ground up flax seed

First you cream together the butter, peanut butter and brown sugar.  Beat in the egg and set aside. In another bowl combine the dry ingredients.  Mix and add little by little too the wet ingredients.  If you live in my house, we also take real Reese's peanut butter cups and crush them up and put them in the dough. MMMMMMMMM

Bake at 375 for 8 to 10 minutes.  My husband loves me when I place a whole reese's in the middle too.  Since it's almost Easter and I had Reese's hard candy coated eggs, I used those instead.  These cookies turned out SUPER yummy!  I should know because I ate 4 yesterday!


This was taken before they were cooked.  Aren't they cute?

If you want to try this recipe without the "healthy" stuff use 1 1/4 cup white flour instead of the wheat flour and don't add the flax seed.  But I PROMISE you they tasted exactly the same so you may as well add the extra goodness.


Saturday, March 5, 2011

Sicko

Well....I went shopping by myself and about half way through my shopping trip I could feel something taking over my body.  By the time I got home I felt awful.  Bummer.  We made dinner and cleaned a little and put the kids to bed.  Tyler was feeling better but was really worn out still.  He wasn't eating much either but he was at least not throwing everything up.  While I was putting Tyler to bed, daddy fell asleep on the couch.  I poked him and told him to go to bed.  I stayed up and watched some TV shows I had saved on my DVR.   I went to bed at 11 and by then I felt horrible.  By morning I felt like I had been hit by a truck.  Tyler woke up early again.  It was 6:30 or so.  He isn't used to taking naps.  I roll out of bed and too the couch.  I told Tyler I wasn't feeling well.  He asked me why I was sick and I told him that sometimes when mommies take care of kids kids they get sick too. Tyler is really sensitive   so I was worried that would make him sad that he got mommy sick.  So I then said, "But that's okay.  Sometimes it just happens."  To which he responded by saying, "Yeah.  IS daddy still taking me to see Rango today?"  I am so glad he was concerned about my health.   So I had the kids by myself until about 11 or so.  Then my husband came home.  He was nice and ran to the store and bought me some cough drops, Gatorade, motrin, jello and crackers.  MMMMM  And that is what I ate all day.  Today I have pretty much eaten the same thing.  I managed to keep down some crackers with cheese on them too and a soda.

Any ways.  So I have been not up for blogging.  I hate not putting things on here especially when I had all of these plans for stuff.  So I am sitting up for a minute so I can leave you guys something.  I have NOT tried this recipe yet.  It looks interesting and good.  I am hoping to try it this week.  I think this recipe applies to the whole "going green" thing because anytime you make something home made you know exactly what is in it and you are ridding food of crap like high fructose corn syrup.  SO here it is

home made fishy crackers

My kids LOVE fishy crackers so I hope these are good because I think it would be WONDERFUL to make these instead of buy them.  If you try them out let me know how you like them.

On a side note my husband DID take our kid to see Rango.  He said they said  the words HELL and DAMN a LOT and that it wasn't really a kid movie. He said the adults laughed way more then the kids did.  Why do they do that?  Why make a movie that looks like it is geared towards kids, make them all excited about it so they WANT to see it and then have it be something they maybe shouldn't see.  BOOOO

Any ways.  I need to go lay down some more.  My husband just ordered pizza and the pizza place here is excellent.  I am praying I can eat a piece!  haha
Related Posts Plugin for WordPress, Blogger...